
Finally, the construction of your dream house is complete. You may think the next step is to make a trip to Home Depot and pick out color schemes – not so fast. There’s still the crucial cleaning step, particularly the final cleaning construction.
If this is your first rodeo, you may not know where to start – what’s the first step? What cleaning products do you use? Don’t fret; we’re here to help.
Let’s dive into everything you need to know about final cleaning construction: the phases, the DOs, and the DON’Ts.
What is a Final Cleaning Construction?
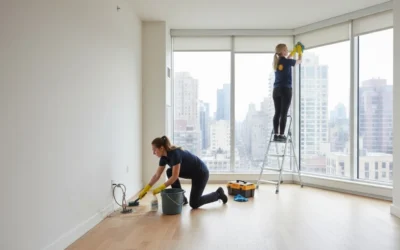
Final cleaning construction is the last step of post-construction cleanup. It’s conducted after a building or property has been entirely constructed or renovated. Although it may be tedious, you can’t skip this step before prepping the house of living.
It typically involves removing dust, debris, and other materials left behind during construction. You’ll need to thoroughly clean your windows, floors, walls, appliances, and fixtures. It’s not just crucial for aesthetics but also to ensure hygiene and avoid inhaling construction dust.
While final cleaning construction is a phase of post-construction cleaning, it also has its phases. That includes rough cleaning, interior cleaning, and exterior cleaning. Doing this cleaning in phases will help you break down the work into smaller, more manageable tasks.
Let’s take a closer look at what each phase accounts for.
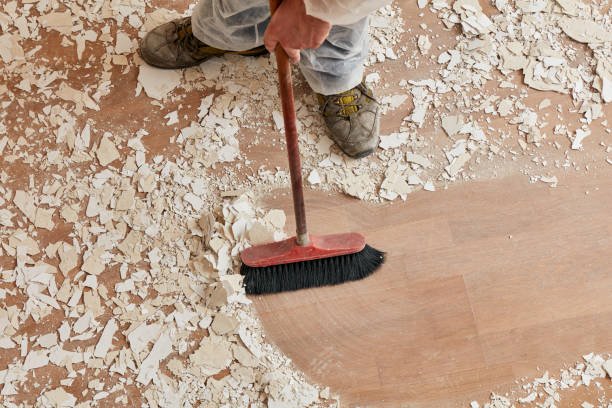
Rough Cleaning
A rough cleaning is basically a quick sweep that doesn’t pay attention to the details. In this step, you’ll pick up the larger trash and debris, such as broken glass, wood, or leftover materials. Your house will be ready as soon as the building is done.
The rough cleaning step is very important because that’s when you pick up bigger, more dangerous things like broken glass that could cut you.
This is the list of things to do for this phase:
- Use gloves and a trash bag to pick up big pieces of trash, debris, and materials.
- Give the floors a quick vacuum and mop, but make sure there isn’t anything on them that could hurt your feet.
- Use a damp cloth to clean all the surfaces in your home, such as your walls, windows, and countertops.
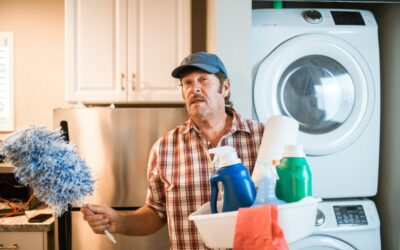
- Dusty areas of the house, especially those where a drill, saw, or sander was used, should be cleaned with a duster.
This way, you can move on to the next step of cleaning without worrying about getting hurt or breathing in too much dust. While you’re at it, take out the trash cans, too. They probably have too much stuff in them from the construction. Don’t forget to get rid of dangerous materials as your area requires.
The builder or contractor is usually in charge of the rough cleanup. Check the Environmental Protection Agency (EPA) rules to make sure they do it right.

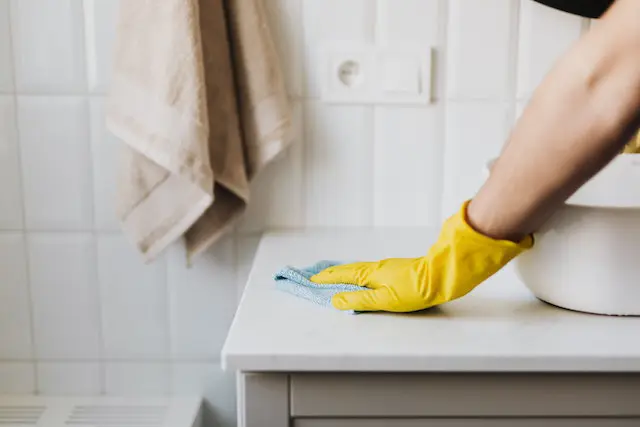
Interior Cleaning
Then, you can move on to a final interior cleaning. How long it takes depends on how many rooms you have and where the construction occurred. Generally, it can take anywhere from a few hours to a whole day.
We recommend starting with the bathrooms and kitchen since those are the rooms you’ll need to use first. You’ll need to thoroughly clean every inch of the fixtures, appliances, cabinetry, and countertops. Leaving any construction dust or leftover materials in the kitchen can be a health hazard.
Then, move on to the bedroom and living room cleanup. If you have carpets, don’t forget to carpet every corner – you’ll be surprised at how much dust gets trapped there. You’ll find nails and screws lying around as well, so keep an eye out for those.
Finally, don’t forget the ceilings. If there was a lot of construction dust circulating, you could use a long-handled mop to give the ceiling a quick wipe-down. Otherwise, use a ladder to get rid of scuff marks and smudges.
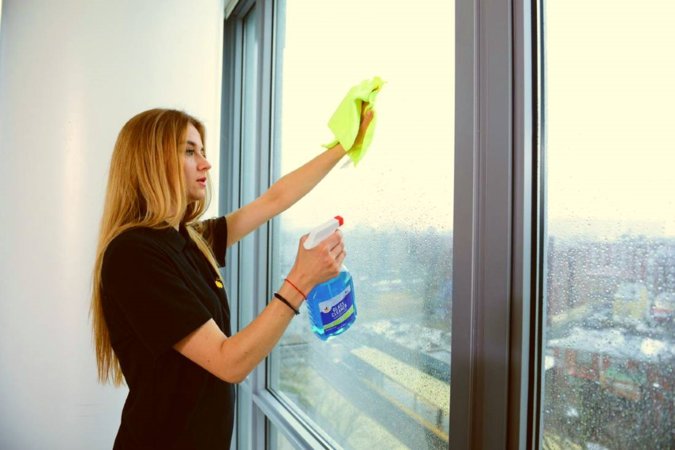
Exterior Cleaning
For indoor-only construction, final cleaning of the home’s exterior may not be necessary. But if there is some outdoor construction, you can scrub the walls well. Here are the steps needed for a final construction cleaning of your home’s exterior.
- Get rid of the debris and leftover materials around your home.
- Wash and dry the exteriors of your windows and doors.
- Sweep or vacuum around the garage, porch, and driveway.
- Get rid of all the dirt and grime from the siding with a quick power wash.
Viola! Your final cleaning project is over. We agree—it takes quite a bit of elbow grease, so hiring professionals may be a better choice for most.

DOs and DON’Ts of Final Cleaning Construction
While it may seem simple enough, a lot can go wrong when finishing up a post-construction clean. Here are some DOs and DON’Ts to keep in mind.
DO Plan Ahead
You can’t skip any steps when you’re planning for a final cleaning project. Cleaning your house every day is easy; all you have to do is pick up the mop and get to work.
You need to plan a lot of things ahead of time, like how many rooms you’ll be cleaning, which one to start with, how long it will take, and so on. You’ll also need to buy the right tools and equipment for the last clean.
Plan these things ahead of time to make sure your cleaning project goes smoothly.
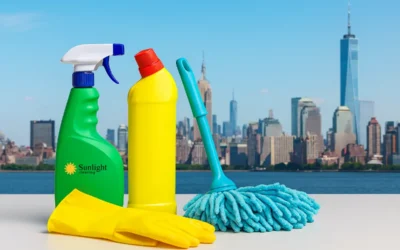
DO Use Proper Cleaning Solutions
Different cleaning solutions work for various surfaces and tasks. Not only is it much safer to do your research, but it also saves you a ton of trial and error.
For example, you can clean the walls with a typical all-purpose cleaner or a homemade vinegar-based solution. But floors require specific cleaning agents for hardwood and tile. You absolutely can’t mix them up!
DO Prioritize Safety
After construction, your home will be littered with broken construction materials like glass, wood chips, and nails. The cleaning process can be dangerous without the proper precautions taken. You’ll need to invest in safety equipment, including:
- Gloves
- Steel-toed boots
- Safety goggles
- Dust masks
- Hard hats
You’ll also need to keep the windows open for ventilation when dealing with construction dust.
DO Replace Caulking and Grout
Even if your home’s caulking and grout have been recently replaced, it will accumulate dirt and grime during construction.
If you don’t have the tools or budget to replace them, scrub them down with an all-purpose cleaning solution. Finally, wipe it down with a wet sponge and let it air dry. You’ll need to repeat this process for your tiled floors, tiled walls, toilets, bathtubs, and sinks.
DO Hire a Professional
In some cases, hiring professional post-construction cleaners may be the best option. This is especially true if the mess is more significant than average or includes quite a bit of hazardous materials.
Plus, moving and construction can be lengthy and exhausting. Once your construction is over, hire professional cleaners to do the job. Take this opportunity to rest before you begin prepping the home for living.
DON’T Rush It
We get it – you’ve waited so long for the construction to be over. Waiting to complete another thorough cleaning may feel impossible, and you’re tempted to rush the final details.
But don’t give into the impatience! This is your opportunity to move into a clean, hazard-free home, so take your time with the final cleaning. Trust us; the results will be worth all the wait and effort.
Plus, when you notice the missed spots later on, you won’t have the motivation to clean them up.
DON’T Use Harsh Chemicals
You’ve just gotten brand new hardwood floors installed; the last thing you want to do is bleach or weather them with a harsh cleaning solution. That’s why we urge you to do your research about the proper cleaning solutions to use on different surfaces.
For example, if you’re cleaning a countertop with a delicate finish, a harsh cleaning agent may undo all the work done in construction. These solutions often have bleach or acids that can strip away the finish or even discolor the surface.
DON’T Ignore The Details
Most homeowners only clean up the more prominent and noticeable messes during their final construction cleanup. That’s a rookie mistake!
It’s not just about the walls, windows, or ceiling but the nooks and crannies, too. That includes the outlets, light switches, and even the window frames. It only adds a few minutes to your total cleaning session, but it’s worth the extra effort.
Otherwise, once you’re all moved in, you’ll wish you had paid them some attention.
Hire Sunlight Cleaning in New York For Final Cleaning Construction
Is final cleaning construction not your cup of tea?
Don’t fret! Hire our experienced and vetted team at Sunlight Cleaning for extensive post-construction cleaning services. Our competitive final construction cleaning prices will keep your project under budget, and we promise to leave your home sparkling clean.
Contact us today to book your appointment and get close to turning your brand-new home into a livable space.

Iryna Balaban
Iryna Balaban – Blog Author and Cofounder of Sunlight Cleaning NY. She is very experienced in the cleaning company business. Iryna was the supervisor of one of New York City’s leading cleaning companies and decided to found Sunlight Cleaning Inc. She has 10+ years of experience in the cleaning branch as owner and communication specialist in the company, and no decision can be made without her input.
Sunlight Cleaning NY Blog Posts
Move Out Cleaning Cost in NYC
Are you considering hiring professional cleaners for your move-out? Learn all about move-out cleaning costs and services here.

Commercial Restroom Cleaning Checklist in NYC
Click here to get the ultimate commercial restroom cleaning checklist with step-by-step cleaning tasks, techniques, and tips for foolproof hygiene.
How to Estimate Cleaning Costs in NYC with Our House Cleaning Calculator – Sunlight Cleaning
Do you want to know how much professional cleaners cost today? Find out the exact cost with our house cleaning cost calculator.
Post construction cleaning supplies: the list of necessary equipment and detergents and valuable tips
The list of post construction cleaning supplies that includes cleaning equipment, detergents at cleaning after repair or construction
Post Construction Deep Cleaning Guide for New Homeowners
Worried about post construction deep cleaning of your home? Learn about the process and find a checklist for deep cleaning here.

How Long Does a Move Out Cleaning Take?
How long does a move out cleaning take? Learn how to make the process easier and faster with the best strategies.