So, you’ve bought your new house or want to change apartment and are about to move in?
But before you get a loading truck and unlock your dream house/apartment, you must consider pre-move in cleaning. Who wants to walk into a smudgy, dusty place after all?
You’ll be amazed at the difference following this guide, and a cleaning list makes to your new home.
We’ve done the hard work and put together this ultimate move in cleaning checklist for all tenants, new homeowners, and cleaning companies. Our comprehensive list includes all the detailed cleaning tasks that should be covered before settling into your new place.
Table of Contents
What is a Move In Cleaning Checklist?
The Ultimate Move In Cleaning Checklist:
Cleaning Material
Tools
Cleaning Liquids
Refrigerator
Oven and Stove
Kitchen Cabinets
Dishwasher
Dispose of Garbage
Clean the Shower Head.
Clean the Drains
Toilet
Carpets
10. Light Fixtures and Electric Outlets
Handy Tips for Move In Cleaning
Frequently Asked Questions:
How Long Does Move In Cleaning Take?
Why is Deep Cleaning Important?
What cleaning equipment and supplies will be required?
What is a Move In Cleaning Checklist?
What is included in a move in/ move out cleaning checklist? A move in cleaning list provides a guideline to individual cleaners and professional companies. It leaves no mark or spot unchecked during the cleaning.
A comprehensive move in cleaning checklist (like ours here) has a complete breakdown of tasks; the tasks are subdivided into subtasks per room and items to be cleaned.
This move in, move out cleaning checklist can help eliminate dust, debris, and dirt from the most discrete places in your house or apartment before you move in or after you shift from your old home.
The Ultimate Move In Cleaning Checklist:
The key to having an efficient move in cleaning job is to have a plan of action. If you go in unprepared, chances are you’ll probably feel overwhelmed. You won’t know where to start, which supplies and equipment you’ll need, and how to get the job done!
So here’s our ultimate move in cleaning checklist, complete with the detailed tasks, supplies you need, and steps you need to cover for a thorough job.
General Cleaning
Every house or apartment is different and has unique cleaning requirements. A good cleaning company can tailor the tasks per the type of house and its cleaning needs. Our checklist here can also be customized per the client’s requirements.
To start with, here’s a summary of tasks on how to clean the rooms in your new home.
- Dust all surfaces and counters
- Use the wet wipe to clean light fixtures, fans, door knobs, and handles
- Use a rag or duster to clean spider webs
- Clean the window panes and doors
- Vacuum all carpets and mats
- Mop and clean the floors
- Wipe the sink, stove, cabinets, and counters in the kitchen
- Wipe clean all appliances inside out
- Sanitize the toilet, shower, tub, and other fixtures like the vanity
1. Do an Initial Search
The first walk-through or initial search is very important. Make sure to carry a piece of paper, a pen, or a gadget to take notes. Look around the corners, hidden spots under the bed, sofas, inside appliances, etc.
Try to take as many notes as possible at this step. It will give you an idea about the supplies you’ll need to clean up, any repairs that need to be taken care of, and places where you need to pay special attention during cleaning.
Check if all the drawers, closets, and racks are empty. Throw away the clutter or things you don’t need. Also, open all the doors and windows to let in some air and ventilation.
2. Gather Tools and Supplies
Before you start, you should have all the cleaning supplies with you. That way, you won’t have to leave the job halfway through to make a run for the stores.
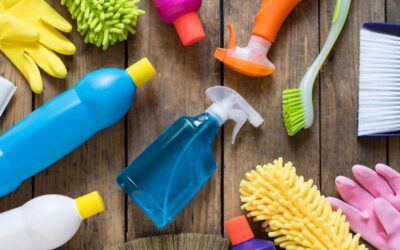
Your complete move in cleaning toolkit should include the following materials, pieces of equipment, and supplies.
Cleaning Material
- Microfiber cleaning cloth
- Broom and dustpan
- Mop
- Cleaning bucket(s)
- Sponge
- Wipes and paper towels
Tools
- Strong vacuum cleaner (Preferably HEPA)
- Squeegee
- Protective gear like mask and gloves
Cleaning Liquids
Make sure to use natural and gentle chemicals only. The harsh chemicals may take off the marks more quickly but cause harm. They can irritate the bronchial tract and skin and may even damage your home’s pipelines.
The supplies you’ll need are as follows.
- An all-purpose cleaner
- Disinfectant
- Sanitizing spray
- Cleaning spray
- Concentrated cleaning liquid
- Window cleaning liquid
- Vinegar
- Baking soda
3. The Kitchen
As per statistics, we spend over 400 hours in the kitchen annually. The kitchen stores all the food, so cleaning and sanitizing it before stocking it up is essential.
We often miss certain areas while cleaning the kitchen. Make sure to clean them thoroughly before proceeding with the other rooms.
Refrigerator
Start with the largest (and most needed) appliance, the refrigerator. Cleaning the exterior is easy. Use the multipurpose or all-purpose cleaner and microfiber cloth to clean the door and sides.
Then move to the inside. Remove all the shelves and removable wall storage racks and wash them with the sponge and kitchen dishwashing liquid.
Take the microfiber cloth and all-purpose cleaner and wipe all the internal surfaces. Clean the shelves, walls, and all nooks and corners.
Scrub gently to remove the accumulated grime and food particles. Clean the microfiber cloth and do a thorough wipe-down again.
Also, make sure to move the refrigerator and clean it.
Oven and Stove
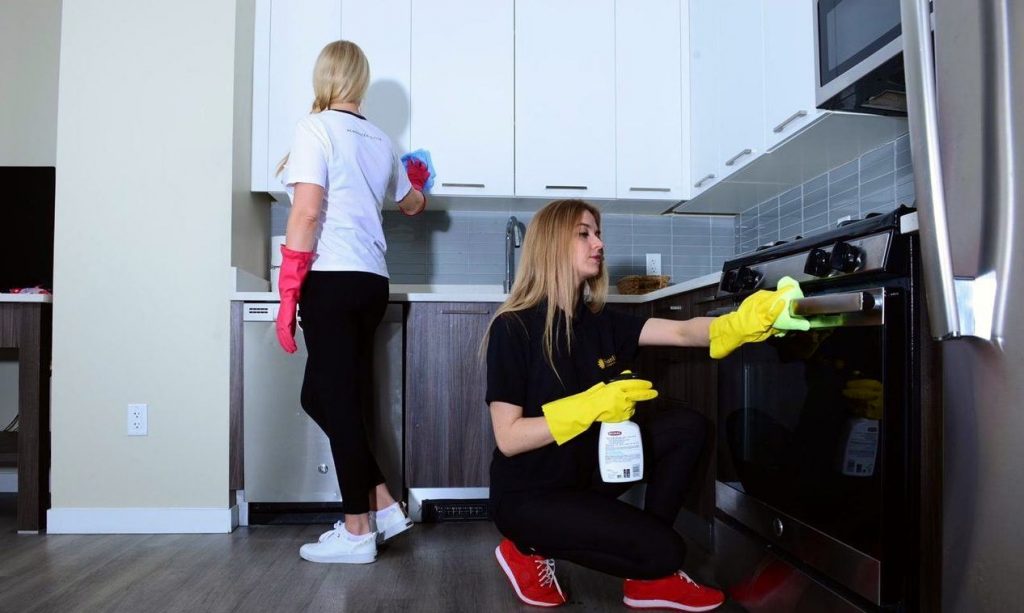
Again, take your trusted microfiber cloth and all-purpose cleaner, and start with the stove burners. Clean the glass stove top thoroughly.
Next, get to the oven. Clean the oven door, and then clean the inside. Remove and wash the washable rotating plate. Clean thoroughly for food particles stuck around the walls and vents.
Kitchen Cabinets
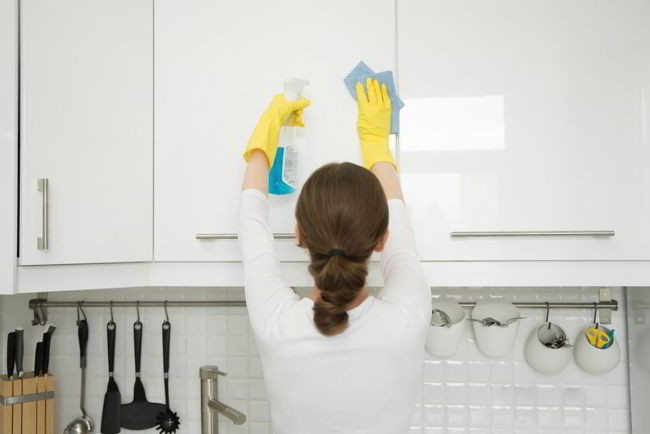
Remove any excess clutter or items in the cabinets. Wipe clean the cabinets using an all-purpose cleaner. Use disinfectant and sanitizer at this point to clean and refresh the cupboard before storing food items.
Always use gentle cleaning liquids to clean the cabinets and drawers. Harsh chemicals can scrape off the paint and polish.
Place a lining inside the cupboard and drawers. This will also prevent future messes and make cleaning easier in the long run.
Dishwasher
Simply run the dishwasher cycle once while it is empty. Wipe clean the inside using the all-purpose cleaner gently.
Dispose of Garbage
Take out all the garbage and dispose of it properly. The garbage bin often gets stuck up pieces of food and other residues that lead to a lot of stench and problems like mold and bacterial growth.
So once you’ve emptied the contents, use a wet microfiber cloth and scrub the insides of the bin. If it stinks badly or has a lot of grime stuck, it would be best to consider a replacement.
You may use lemon citrus or lemon peels inside it to keep your garbage smelling fresh and pleasant.
Next, follow the general cleaning steps, which are:
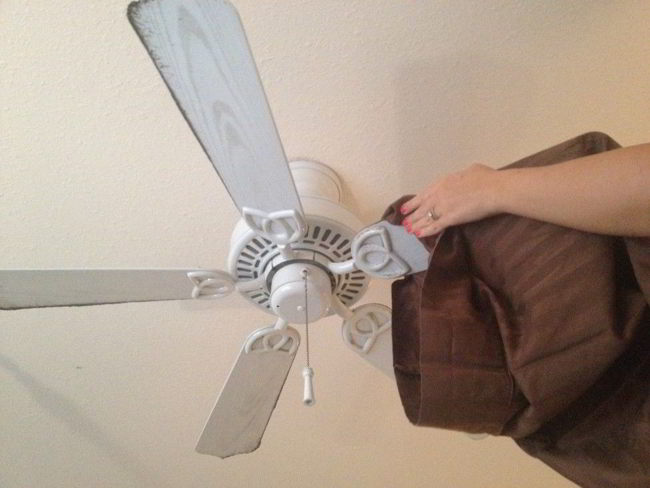
- Clean the ceiling fans and cobwebs
- Clean the light fixtures
- Wipe clean cabinets, cabinet doors, and shelves
- Dust and wipe the counters and shelves
- Wash the sink and backsplash
- Dust and wipe all the surfaces
- Clean the windowsill and windows
- Wipe clean the door and door handle
- Clean the electric outlets and sockets
- Scrub off any marks on the walls and baseboards
- Clean the blinds and ledges too.
- Vacuum and mop the floors.
4. The Bathrooms
It is the most used room in the house, after all. So you need to clean the bathrooms thoroughly before you start using them.
Here’s a little bathroom move in cleaning list to keep in view when cleaning.
- Clean the windowsills and window tracks.
- Clean and sanitize the bathtub, shower, glass door, and shower walls
- Clean and sanitize the sink
- Clean the toilet and toilet bowl thoroughly
- Wipe clean the mirror and vanity
- Wipe the cabinet interior and external surfaces
- Dust and clean all the counter spaces, and shelves
- Wipe clean the doorknobs and door frames
- Scrub off the stains on the walls and fixtures
- Clean the baseboards
- Wash and mop the floors
Clean the Shower Head.
If the house has been lived in, start with the shower head. Cleaning the showerhead at this stage will give you months of peace. It’s common to become blocked due to the grime, calcium, and mineral buildup that accumulate around the tiny holes.
Use a mixture of vinegar and water and scrub clean the shower head. Also, check out this guide on how to clean the shower head at home.
Clean the Drains
Whether they’ve been used, clogged, or not, always ensure to clean the drains. You can use the snake and drain cleaner to clean them yourself or call in expert move in house cleaning services.
Toilet
Cleaning the toilet at this stage will make it easy to maintain for years.
A tip for cleaning the commode is to lift off or remove the toilet seat. Then, use a small brush to clean the insides and sides of the seat. Remove all marks and stains.
Check the bathroom for mold and water damage as well. Make sure to have leakages, if any, repaired before you move in.
Pro Tip: Use eco-friendly green products to clean the bathrooms. Commercial cleaners have harmful chemicals that can damage the tiles and often leave dangerous fumes that can affect your respiratory health.
5. Bedroom Cleaning
Cleaning the bedrooms is very important before moving in. There may be bacteria and other allergens that could cause serious health issues.
Start from the top and clean the ceiling fan and cobwebs first. Then, move to the light fixtures and electric boards.
Clean the wardrobes, furniture, tables, and bed using an all-purpose cleaner and wipe.
Follow the same process for all the rooms of the house and finally vacuum the carpets and mop clean the floors.
Here’s a bedroom checklist that’ll help you stay on task while cleaning:
- Dust all surfaces
- Clean the wardrobe’s interior and exterior sides
- Wipe the walls and baseboards
- Clean the mirror using glass cleaner
- Clean the windows and window panes
- Wipe door knobs and door frames
- Vacuum hard floors and carpets
6. Living Room
When you have all the space and no bulky furniture coming your way, it’s the best time to clean the living room. Other areas that should be cleaned along the living room include the dining room, entryway, hallways, and large landing areas.
Here’s a checklist to help you easily clean the living room and other common areas.
- Dust and wipe all surfaces
- Clean the mirrors and windows
- Clean inside the window pane
- Dust clean the walls and baseboards
- Wipe the light switches
- Erase and clean the markings or spots on the walls
- Clean inside the closets and wipe their exterior
- Vacuum all rugs and carpets
- Vacuum and mop the hard floors
7. Floors and Carpets
Different houses have distinct kinds of floors.
- Carpeted
- Bamboo
- Laminate
- Tiled
- Wooden
- Travertine
- Concrete etc.
All these require a different approach to cleaning. Use a vacuum to clean the carpets and mop the concrete and wooden floors. Here’s a guide on how to clean different types of floors without damaging them.
Carpets
Get your carpets steam cleaned before you move in. Professional cleaning companies bring in all the supplies needed for steaming and deodorizing the carpets, but you can also get the same done following the video here.
8. Windows cleaning
Use the vacuum cleaner to clean the window sills and tracks. Use the proper attachment to take out all the accumulated dirt and debris. If the house is old, you may find bugs or cobwebs stuck inside the window pane.
Next, use the microfiber cloth to wipe clean the windows. Use the window cleaning liquid spray and squeegee clean them.
9. Doors cleaning
Use the all-purpose liquid or spray and clean the door knobs and handles. The best is to start cleaning the door from the top. Wipe it clean, then clean the front and back of the door.
Finally, sanitize the door handles.
Make sure your cleaner is compatible with the wooden and painted doors.
10. Light Fixtures and Electric Outlets
Light switches and fixtures gather a lot of dust and grime over time. Take a wet microfiber cloth and wipe clean the fixtures and electrical outlets. If the fixture shades can be removed and washed, wash them with water and soap.
Completely dry them out and place them back. Always be careful not to use a very damp cloth or go deep cleaning the electrical outlets.
11. Wardrobes and Cabinets.
Wardrobes develop a musty smell over time as they stay closed and get very little ventilation. Open up all the doors to let out the aromas. Then wipe them clean using an all-purpose cleaner.
Also, sanitize and fumigate towards the end. That’ll take care of the silverfish and other bugs.
17. Outdoor Space
The exterior of the house also deserves due attention when cleaning. Clean the porch and patio first. Use the broom to clean the walkway and scrub clean the porch.
Next, clean the windows using the glass cleaner and the light fixtures.
Lastly, check the gutters for blockages and leaks. Have them fixed by professionals so your stay is smooth and without water damage issues.
 Handy Tips for Move In Cleaning
Here are a few further tips to make a move in cleaning a breeze.
- Refrigerator: In the kitchen, always start with the refrigerator cleaning. Refrigerators often take a lot of effort to clean on the inside. Plus, you need a clean refrigerator for food storage just as you take the first steps in your home.
- Top to Bottom: Make it a rule of thumb to clean from top to bottom. Let the dust, cobwebs, and debris move down as you clean. That way, you’ll be able to pick up on all the specs and particles as you clean the house.
- Disinfect Bathrooms: Whether it’s a new home or one that’s been lived in, the bathrooms are likely always used. Make sure to thoroughly clean and sanitize the bathrooms. In the end, disinfect so that all leftover germs or bacteria die.
- One Task at a Time: The best approach is to do one task for all the rooms followed by the next. First, clean all the rooms’ ceilings, then clean the windows, etc., and finish off by mopping the floors of the entire house.
- Move In Cleaning Checklist: Keep your move in cleaning checklist in clear view. Use it as your guide. Tick off the tasks as you complete them so nothing’s missed or left out.
- Baking soda: Baking soda is excellent at removing the odor of any kind. Sprinkle a generous amount over carpets or other areas to clean off any stubborn grime and eliminate smells.
- Call in Reinforcements: Call your friends and family for help. You will be shorthanded if you attempt to clean the entire house yourself. You’ll find many friends and family members who would be more than willing to help you in this time of need.
- Turn up some music and order in, and make cleaning fun!
- Set Traps: If you have an ant infestation or, worse, rodents, set traps. They are mostly found around the attics and basements, so cover your bases.
Take your time cleaning the property; ensure you do a thorough job.
FAQs on Move-In Cleaning
Moving into a new space can be both exciting and overwhelming, especially when it comes to cleaning. Here are some frequently asked questions that can help you plan your move-in cleaning checklist:
How Long Does Move In Cleaning Take?
Depending on the size and design of your home, a complete move-in clean may take anything from 4 to 8 hours. This time frame includes all important work, ranging from dusting and scrubbing to deeper cleaning. If your new home has considerable household traffic or communal facilities, plan for regular deep cleaning to keep the area looking fresh.
The period for the cleaning depends on a few factors:
- The condition of the house
- The size
- How old the construction is.
The general rule of thumb is that big houses take longer to clean. Then if the house is new, it will generally take less time, but old homes may have a lot of leftover stuff from previous tenants. They may take longer to clean.
Finally, the construction and condition of the house also play a determining role in how long it’ll take to clean.
Once the cleaning company has assessed the situation and condition of the house, they can provide an estimate for the duration of cleaning.
Why is Deep Cleaning Important?
Buying a new house or changing apartments and moving in can be quite an exciting time. It’s the beginning of a new chapter in your life. But you may sometimes be slightly disappointed on your first tour after getting the keys.
If the house has been lived in, the previous owners or tenants may not have left everything spick and span per your expectation. So before you bring your stuff in, you should clean the place while it’s less cluttered.
It’s also an opportunity to have the place sanitized and fumigated and get any repairs done while you’re at it. Moreover, it’s far easier to maintain a clean home later than a dirty one.
Cleaner homes can also attract better prices for your property in the future.
What cleaning equipment and supplies will be required?
A few pantry staples will be a lifesaver. Baking soda, for example, is great at removing stubborn stains and smells. Keep cleaning liquids on hand to apply to entryways, doorknobs, and light switches.
Which areas are commonly overlooked?
Most of us always miss those sneaky spots! Baseboards, appliance backs, ceiling fans, and light fixtures are typically left out of daily cleaning. Don’t miss balconies and areas around shared facilities where dust and dirt accumulate over time.
To simplify your cleaning procedure, download our Move-In Cleaning Checklist PDF and keep a hard copy at hand. This handy tool guides you through each nook and cranny while you complete your move-in cleaning procedure.
Should I Clean a New House?
If you’re going to live in a newly constructed house, it’s just as essential to have it cleaned before the move.`A lot of dirt and debris settle into places following new construction.
It takes rounds of cleaning to get it all out. So even if the construction workers have tried to clean up after them, many particles remain suspended in the air. They slowly settle down, engulfing the entire house in the dust.
Plus, there could be remains of harmful chemicals and the builder’s dust that can take a lot of effort to get out. These can also cause severe allergies and chemical sensitivities.
It’s easier to clean just about the time you get your keys. The place won’t have your furniture or boxes; it will be relatively empty, so getting around stuff will be easier.
You’ll have a better view of the whole house and can get to all the hidden spots quickly at this point. Moreover, you must also consider sanitizing the place, making it safer for yourself and your loved ones.
Conclusion
Remember, you need efficient service to quickly clean up the place and get ready to move in. While you can get the job done yourself, you will need several tools and invest a lot of time and effort to clean the place.
Hence it’s best to call an expert move in house cleaning service like Sunlight Cleaning Services NYC. We will help make your new place sparkly clean and ready for moving in as soon as can be.
Leave the mess to us and invest that time and energy into moving and completing your paperwork instead. Call us at 212-920-5966 or contact Sunlight Cleaning NY via quote form to get in touch with our experts.
Sunlight Cleaning NY Related Blog Posts
Bedroom Deep Cleaning Checklist to Make Your Room Spotless Clean
This checklist is your savior on your cleaning adventures. Get your bedroom deep cleaning checklist to finish major tasks while cleaning.
Move out Cleaning Checklist: Top 15 Move Out Cleaning Tips
So, you’re just about to move? That’s amazing! Hopefully, your new home will bring you even more joy and good memories than your last home! You will need a move out cleaning checklist, however. Even though you will be moving to a new place, cleaning work is still...
Is My House Too Dirty For a Cleaning Service? 5 Things to Do
Whether you live alone with a hectic work schedule or have kids and pets that barely heed your commands, your house is likely to be a mess. There's a trail of kids' toys from the living room to the bedroom. Your furry little friend has left paw marks all over the...
Spring Cleaning Checklist 2025 – The Ultimate Guide
Thinking about where to begin the season’s cleaning? Check out our ultimate spring cleaning checklist and get your home clean and tidy!
How Long to Clean a House: A Detailed Guide
Learn how long it takes to clean a house with our detailed guide on regular and deep cleaning routines. Get insights on durations and tips.
Standard Cleaning Checklist for a Spotless Home
The key to a clean home is avoiding the mess before it multiplies. Check out our standard cleaning checklist to keep your home feeling fresh.

